Showing posts with label Work-In-Progress-CherudimSaga. Show all posts

Thursday, November 17, 2011

WIP: 1/100 NG [BANDAI] Cherudim Gundam 12

WIP: 1/100 NG [BANDAI] Cherudim Gundam

So here's my part 2 WIP blog entry for my Trinity inspired dio. The status of this wip is already 90%, 5% for Painting and 5% for weathering. Its a little bit late because of the putty curing and Led Ciruit.

So here's the update yesterday:

 Before the priming, the plaplate parts stick to the wood by masking tape. 
I also used this axe-like wood so i can rotate the parts while spraying and to avoid paints on my hand.


Priming the parts.


INSIDE!

I only used Bosny Light Gray for the dark parts and install the led wiring inside.


while the PCB is hiding at the back of the wall.


Added another wall.

I only used Legos to serve as stand for my acrylic plastic. 


DETAILING!


Sunday, November 6, 2011

WIP: 1/100 NG [BANDAI] Cherudim Gundam 11

WIP: 1/100 NG [BANDAI] Cherudim Gundam

TRINITY INSPIRED BASE REVEALED!
Update number 11 for Diorama WIP. Since cherudim is already painted and the only thing i'm gonna do is to detail it with photo etch and decals. You can check cherudim in our GMAC / MAC Meetup blog entry here

This Diorama will be a big challenge for me since this is my first time to make a mech base. As you will notice there's an acrylic clear plate on the dio, because I'm going to light it up with LED inside!


I got the Idea from Erik Tan of Trinity Group Build, So credits goes to them And Pla-plate detailing goes to Don Suratos' ZETA Diorama & DOM. Thanks also to Kenny Lim for allowing me to use the concept.

 Size Comparison with the Normal Led.
(I draw the design first, then cut them up with scriber)


I only use my Hobby knife and scriber on this dio.
 

I also detail up the side of the base and use Mini Legos to serve as stand for the upper part.

I'm still planning where to put the leds inside for the Flat Bright effect.


Special Thanks to Adrian for guiding me :D so, That's all for now... 
I'm going to post some pictures of my Cherudim Saga soon.

Friday, September 30, 2011

WIP: 1/100 NG [BANDAI] Cherudim Gundam 10

WIP: 1/100 NG [BANDAI] Cherudim Gundam
Update number 10 is up!


I trimmed the original connector of the Holsters to Dynames Knee and putty it then sand.


And then I've placed .3mm Pla-Plate on it to hide the putty and scratches.


And for Attachment. I just glued this 3 of .5 mm and add a 4 mm box on, so i can attach it on the hollow part of the side skirt for easy attachment.


Last Saturday, I bought this Tamiya Pla-Beams 2mm Square. I didn't know that this one is too thick to cut by a hobby knife only. 


This one is not that soft as the normal 2 of .5mm pla-plate sheet that you can easily cut by a hobby knife.
So here's what i have done, I used this Pla-Beams on Cheru's Feet.


I also detailed the right leg and shoulder of this guy with pla-plate and lollipop stick.


Since the seamline is not on the same position like on the right shoulder, I decided to just detail the half of this kit and leaving the left side plain to be different.


Trimmed some part.


And add Details into it! 


And here's the messy front skirt  because of the panel lines.


Here are some of the Pictures with the holsters.


The Rifle.


I also started to draw 4 Concepts for my Dio.


Friday, September 23, 2011

WIP: 1/100 NG [BANDAI] Cherudim Gundam 9

WIP: 1/100 NG [BANDAI] Cherudim Gundam
Update 9 includes Easy-Modding on the feet and also detailing the kit.


I added some details to the lower part of the shoulders and feet.


This is my 2nd Idea. (Piston is the 1st one)
(Voting starts now. Vote on the right side of the blog)

Overall look.

I just trimmed this white part so i can bend it more.


So, here's what i'm doing to do with the legs. 
First, I sand it about 2 minutes i think, to make the seamline wider.
then I just glued the koto vents on the front part like this.


And here's the result... 
I will add more details into it to make it more different from its original look.


While thinking of the designs for the legs, i started to remove the upper part of the rifle just like in the reference.


This is what it looks like when holding H-arms custom's Gatling Guns.
I still don't know if i'm going to put it on the backpack or stick to my "Unicorn Full Armor Backpack"


I really excited to finish this kit.. here's another picture.


If you have any ideas for its Backpack, Shoulder Detailing and Color Scheme, etc. feel free to give some negative / positive comments on this post (Just Let me know what's wrong about it, Ok?) or in its WIP thread at MAC Forums.

Stay Tuned!

Friday, September 16, 2011

WIP: 1/100 NG [BANDAI] Cherudim Gundam 8

WIP: 1/100 NG [BANDAI] Cherudim Gundam
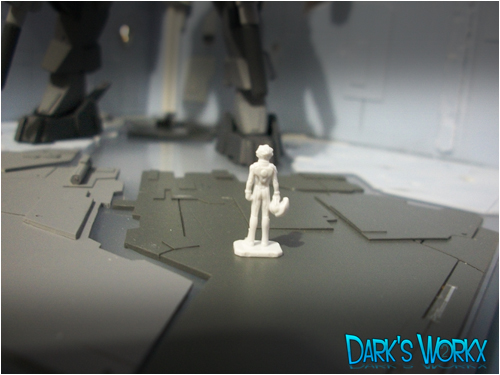
I start Scratch building the Rifles and here are the photos so far. I made some mistakes on some edges so i decided to make 2 rifles than using the original one. I hope someone could sell his/her Cherudim's GN rifle so i can minimize my work.

First I used my ruler to measure it then make the middle part of the weapon.


And Tada! My mistake on this one is the thickness of the middle part (Sandwich-ing).
I also use Balloon sticks and insert it on the pla-plate peg like in the original one.


Here's the next part:


Checking the Size:
(The red arrows showing my mistakes, I didn't noticed this part)


I made these .3mm Pattern for adding panel lines to the lower part.


Then Gluing the mini Magnets inside the lower part so i can attach it to the knee.


So here's the result!


Next is the Left Part.


And here it is. All i need to do is putty it up to hide those seamlines.


So, i will this pause for now so i can work on the knee and arms again. 


I reconstruct the knee again. I used 1.5 mm for the base and 1 mm for the 2nd layer (Upper part) and .5mm for the (lower part)


Here's the previous scratch built one.


And here's the new knee and better than the previous one because you can paint it seperately than the old one and also removable because of the black part inside of the knee part.


and that's all for now...I'm still fixing the arms because of the trimming failure T_T