Thursday, June 9, 2011

PS: How to make GN Particles?

Basic Gunpla GN Particles
by: DarkWorkx


REQUIREMENTS:


- Photoshop CS 3-5
- Your Gunpla Photo (Got it from Jay Isaac' Flickr)
- Download the Brush Set here


STEP 1:


to install the brush, paste it into:
C:\Program Files\Adobe\Adobe Photoshop CS3\Presets\Brushes


Open your Gunpla Photo. 
Make a New Layer renamed it to GN Particles. 


(Renaming it by double clicking the layer's name)


Then Right Click on the Background Layer and select "Duplicate Layer" and right click the "Background Layer" again and delete it.


STEP 2:


Apply some Galaxy brush (Brush Tool (B)) to the 00's GN Drive and condensers with #FFFFFF (White Color):


Create a New Layer again and rename it to "GN Particles 2" 
Apply a random Brush using (Brush Tool (B))
then go to (Filter>Blur>Motion Blur) and follow this settings: 


(The Direction of the Motion blur depends on how the gunpla facing its direction)


Move the Particles beside 00's GN Drives and here's the Result:


Go to (Filter>Sharpen>Sharpen) to sharpen the particles (GN Particles 2 Layer)
then delete some brush excess by using (Eraser (E)) and set the flow to 15%


Make a New Layer again and renamed it to "GN Particles 3" and apply some Random Particles again on the GN Drive.


Make a New Layer and name it to "Soft Brush" and apply them to the condensers and GN Drives like in this picture.


Set "Soft Brush Layer Blending mode to Overlay" and "Opacity by 40%"


Make a New Layer again and renamed it to "Clouds".
Set the Foreground to White and Background to Black from the Toolbar.


Then go to (Filter>Render>Clouds)


and you will get something like this:


then go to (Image>Adjustments>Brightness/Contrast) and follow the settings:


Then Set the Layer Blending Mode to Overlay and Opacity by 50% and go to (Blur>Motion Blur) and set this setting:


Then go to Layer Adjustment and select Color Balance and then follow the settings.


and set the opacity to 70%


Make a New Layer and renamed it to "Cyan". Apply Soft Brush with #00F6FF (Color Cyan) on GN Drives, Condensers and Randomly on the particles and set the Blending Mode to Overlay and Opacity by 40%.


Go to Layer Adjustment and Select Photo Filter.
Set the color to #00D3EC and 25% for Density.


Make a New Layer and rename it to "Cyan". Apply Soft Brush with Color (Cyan) on the GN Drive and Condensers and set the Layer Blending Mode to Overlay and Opacity by 40%


and drag the layer below:


Make a New Layer and rename it to "Brushes".  Apply more Galaxy Brushes around the Gundam and set the Layer Opacity by 50% and Blending Mode to Overlay.


Added a black frame on it and here's the final result!


ENJOY!!!


Sunday, June 5, 2011

3DS MAX: The Making of Servbot Model

The Making of Servbot Model
by: DarkWorkx


First of all... I would like to tell you all, that this tutorial is for our Private Modeling/Texturing Workshop.
But, I made it public so everyone learn how to model using 3ds Max.


I want to build a forum with lots of Modelers you know...
You need my permission if you want to post my tutorial on other site!


Program used: 3ds Max 9


Here's the picture:

THE HEAD


Create a cyclinder (Create Tab from the Toolbar)


and then Right click on the object (Make sure you selected the whole object)
and go to Convert to Editable Poly


then go to the Modify Tab on the right side (Toolbar) and you will see there is Editable Poly.
You can edit object using Vertex, Edge, Border, Polygon and Element.


1. Vertex - Helps you edit polys. Move them rotate them...anything
2. Edge - Helps you select edges like in this picture:


3. Border - Helps you select only strokes or border of the face (You can only this for holes):


4. Polygon - Helps you select faces.


5. Element - also helps you select elements or different objects (Geosets)


These are the basic Tools you need.


1. Select Object
2. Selection Region - Helps you choose differents shapes to select (complicated position) polys.
3. Select and Move
4. Select and Rotate
5. Select and Uniform Scale - helps you choose also different scaling angles.


After selecting the polys, Making something like this using Select and Move tool. (follow this picture)


and then select the middle circled meshes using polygon
and go to your toolbar and choose Extrude and then, drag it upward.


Rescale it using Select and Uniform Scale. (Like in the Concept pic)


THE BODY


Make a Cyclinder and repeat the steps in the previous post. (The Head)
For me, I didn't create a cyclinder object. I used bevel and extrude like in the picture.
(The difference of Bevel and Extrude is, Bevel can Extrude with scaling.)


Next, make a Sphere and set the Segments to 10 only and convert it to Editable Poly.


and ofc follow the concept picture and use Extrude and bevel again (Don't forget to use Polygon or Vertex Selector)


and then use Edge selector and select the edges like in picture and right-click and choose Connect.
(This selection helps you to divide the mesh/face)


(You can also set your own number by going to right click it and press the mini icon behind connect)


Mini Icon:


Divide it with your Number!


Then...Make something like this:


Continuation


Now...We're going to make the screw. Create a sphere again with 10 segments and erase the half
and follow the picture...also place the screw to its position like in the concept pic.


Make a sphere again and use polygon selector to select the box at the center.


and then Extrude it to make a hand like this:


then select the meshes using Polygon and then hold shift and move it to the left.
(A window will pop-out and set Clone to Element and press OK)


and ofc you should Rotate that and copy the same Finger position by moving


then Select the square thing from the left side of the sphere and then press Delete to make a hole:


and then select each poly and use Target weld to connect the poly to another poly like this:


then place it to the left arm.


then its FINISHED!!!
Just Repeat those steps until you finish making the legs!


Saturday, June 4, 2011

WC3: Anime Battle Characters [ABC]

Anime Battle Characters
Here is my late post for Anime Battle Characters Warcraft III Map
Map by my friends, Deckai & Thomasinow
Play characters from different anime series in a Hero Arena. 


Heroes

Ichigo, Grimmjow, Shiki, Akiha, Shana, Yuji Sakai, Nanoha, Louise, Miku, Haruhi, Konata, Reimu, Black Rock Shooter, Avenger, Blackstar, Kanade, TK.

UPCOMING HEROES

Assassin (FSN), Aigis, Sakura, Roa, Deadmaster, Gintoki, Yuki, and a secret character

How to Play?

Install Reign of Chaos and Warcraft Frozen Throne and set the version to latest.

Latest Version 1.1 Map


Full Changelog of version 1.1

New/Update Features:

- Added 4 new Heroes (Avenger, Kanade, T.K, and Black Star)
- Unlocked BRS to playable character
- Added 2 new Bosses (Tarasque, Azure)
- Now Bosses will drop rare item upon the death
- Now owned items can't be picked up by other players than its user (except boss items and charged)
- Now Camera can be freely set (original set is 200)
- Now after duel finished all players will returned to their base
- AI smarter and stronger with 3 difficult choice (Easy, Normal, and Insane)
- New Console Interface
- Added Assist system (Assist got 40% of the main bounty / number of player assisting, and 60% for the killer)
- Added some new interfaces
- Lag Reducer added
- Added 25 total Team Kill choice for Team Kill
- Added Normal Game choice for Destroy Tower
- Items can now be freely merged (Example: Sword Level 2 + Sword Level 2 = Sword Level 4)
- Double kill or higher is given to players who kills again within 7 seconds, and added with sound
- Starting Gold is now 5000 each team (spreaded to whole team, if your team is 2 players, you get 2500)
- Experience Gain reduced by 20%
- Now creeps are spawned each 22 seconds
- Music removed
- Grammar Fix
- Knockback does not happen to dying units, and also units will not be knocked out of playable map area
- Now ultimate can be learned from level 8

Bug Fixes:

- Random small bug fixed
- Random small leak fixed
- Random small spell fixed
- Random small item fixed
- AI drop Item bug fixed
- Command random fixed
- Command unstuck fixed
- Duel system fixed
- Some Fatal Error fixed


Spells Revamps:

*Ichigo
- Getsuga Tensho now share cooldown
- Ichigo 2nd Skill new sfx
- Both Getsuga have new sfx
- Ichigo Ultimate is updated with critical bonus
*Grimmjow
- Grimmjow Desgaron is changed and new sfx
- Grimmjow 1st skill new motion effect
- Grimmjow 2nd skill now slows instead of damage
- Grimmjow default ability changed to Hierro
*Shiki
- Shiki 1st skill new motion effect
- Shiki 2nd skill new sfx
- Shiki ultimate is updated and added Last Arc (Conditions: Shiki must have maximum mana and target unit)
*Akiha
- Akiha Ultimate cast range changed to 300, and deals more initial damage when casted with range below 150
- Akiha 2nd skill updated (ignite can be cast using same shortcut [W])
- Akiha Ultimate new sfx
*Shana
- Shana 2nd skill now share cooldown
- Fuzetsu can only be used 10 seconds after another Fuzetsu
- Shana 1st skill new sfx
- Shana Fuzetsu is not global anymore and have different sfx and durations
- Shana Ultimate is changed, have chaos type damage, and reduced cooldown
*Yuuji
- Yuuji 1st skill now slashs faster and have new sfx
- Yuuji 2nd passive skill, now with ability to immune toward fuzetsu, and better regenerations
- Yuuji Ultimate is updated with bonus 25% from max hp
- Yuuji no longer cast Fuzetsu, instead does Blutsauger
*Nanoha
- Nanoha Flash Move is updated and new sfx
- Nanoha 1st skill new system missile
- Nanoha 2nd skill nerfed a little
- Nanoha 3rd skill new sfx
- Nanoha Ultimate new sfx
*Louise
- Louise now take more 25% more damage from the Zero Explode
- Louise Ultimate new sfx
*Miku
- Miku 1st skill is changed to Mahou Negi
- Miku 2nd skill now heals by percentage of max hp
- Miku 3rd skill is nerfed
- Miku Ultimate new sfx and effects
*Haruhi
- Haruhi 1st skill now have sucking effect
- Haruhi 2nd skill now have trail effect upon activation
*Konata
- Konata 2nd skill updated with new random skills
- Konata 3rd skill new sfx
- Konata Ultimate new skill and sfx
*Reimu
- Reimu 1st skill bounce more slower
- Reimu 2nd skill new color sfx
- Reimu 3rd skill is updated, now it charges instead of returning
- Reimu Ultimate new skill and sfx
*BRS
- BRS 1st skill is changed to Rapid Fire
- BRS 2nd skill nerfed
- BRS 3rd skill is changed with new effects and renamed to Chain Action
- BRS Ultimate sfx changed


Friday, June 3, 2011

WIP: SD Gundam Astray (Red Frame) 3

WIP: SD Gundam Astray (Red Frame) 3

Its Time for Trimming, Pla-Plating and Panel Line Scribing!

Adding Designed Pla-Plates on the Astray's head and chest armor.


For Scribing Panel Lines, I only used a small pin and a dymo tape on it.
See the blue pin in the pic? ^^ 


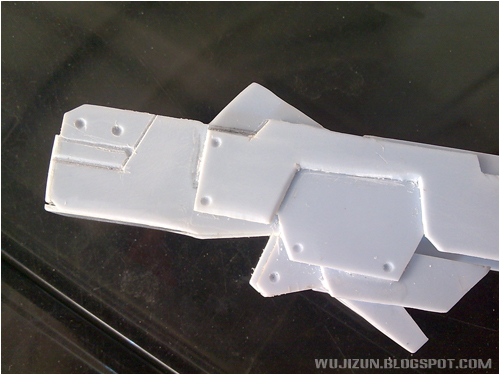
Here is the concept of my Vfin :D I used .3mm and 1mm Pla Plate and hobby knife for trimming. 


I made some details using my cheap scriber and drill bit.


I also trimmed/damage/Pla Plating some parts of the shield.


Here are some photos taken from our PGBC meet-up