Sunday, March 27, 2016

WIP: 1/144 HG - RX-75 Guntank

WIP: 1/144 HG - RX-75 Guntank

Here's my commission work and its a 1/144 Scale! Yes it is! This second to the last commission work for the year 2015 that has scratch building work, the last one is two 1/144 scale Strike Dagger I forgot to take pictures of them so I won't be posting them here in my blog. Ok Let's get started with this reference:


The pictures will explain it to you how did I convert the original 1/144 HG Guntank into that version.


Before continuing I just realized, instead of dividing the chest parts using hobby saw to widen the upper body, I just let it stay like that because it might ruin everything. Sorry I made a mistake on creating the upper body and head but its already finished!! Let's move on to the pictures of the final stages.


Go Check the finished product on my Completed kits menu. Thank you for standing by!


Tuesday, August 25, 2015

COMPLETED FIGURE: Hulk (1st Appearance)

COMPLETED FIGURE: Hulk (1st Appearance)

Long time No post! 

Here's my quick repaint of the Marvel legends, First appearance Hulk!


It is my first time to paint a articulated figure and I'm enjoying it, except the paint chipping after moving the painted joints! 


Actually I made a big mistake by priming it after sanding and cleaning the figure and afterwards, painting it directly all the way to the finish line but, forget about it!! Its already finished!

I'm open for all your comments and feel free to share your ideas below this post!

Paints that I've used: 

1. Bosny Primer Gray (Just make sure to let it stay in sunlight or put it on a warm water so that the result will be more thinner than the direct spray after clogging)

2. Vallejo Model Air 
 - Gory Red
 - Pale Green
 - White (For the Light shading)

3. Vallejo Model Color 
 - Oxford Blue (For the Purple Paints)
 - Dark seegreen or German Grey (Black Parts such as the Hair, Eyebrows, Red Hulk's Pants, Panel Lines, Dark shading)
 - Matt Varnish (For Matt Topcoat)

4. Pledge Wipe and Shine (For Gloss Topcoat)


Pictures:


WIP: Minion (Megaman Version)

WIP: Minion (Megaman Version)

Hello There!

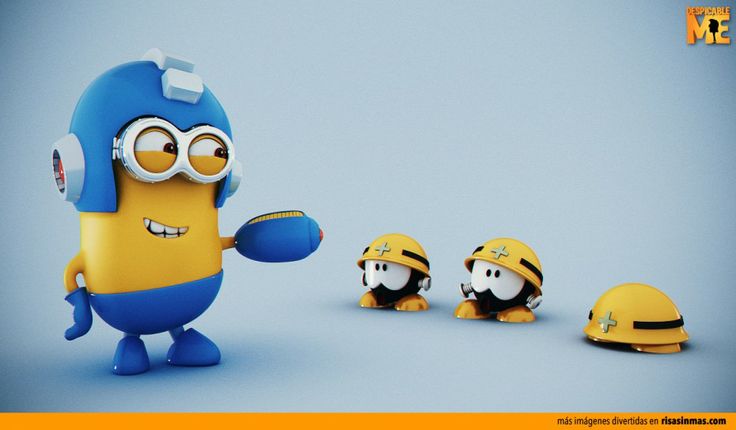
Here's my second figure in progress and I started this project when I get tired and quit Gunpla wayback July 7, 2015 for the meantime, I have shift to figure customizing and I choose this figure from Mc Donalds' Happy meal Despicable Me to make myself my own Megaman version of this Minion.


When I saw someone posted this picture from facebook, I quickly search for it and sadly I only found one and its the same picture! But, that's not a problem because the concept is just simple to make and I decided to do it as fast as I could!
I used my Rotary tool for sanding to shape all the sculpts and make it smooth as possible just like the helmet.

What I did first is to sand down the clothes/body and make it look like a tablet and sculpt the new clothes just like in the reference picture and then extend the height of it using Plastic Styrene sheets or Pla-Plate in Gundam Modeling.


Second is to make a big hole on the head part so I can easy insert the eyes on the back part of the googles and then make a base for the eyes just like in the picture so it will be more steadier when inserting it.


The third step will be the cutting or separation of the hands from the original yellow fixed arms and drill a hole for the stranded wires (For Being bendable for the new arms) to insert in, so you can still rotate the hands/Buster.


Step 4 is to sculpt this mini Megaman's boots and add a peg connector on it and I also sculpt the helmet using Pioneer Marine Epoxy Putty little by little until I reach the top and cover it then add the original helmet detail parts (Light Blue) from my Bootleg Rockman Figure, and I also add 1mm Plastic sheet on the lower part of the helmet as you can see in the picture.


After sculpting the boots and the helmet, I primed it using Bosny Spraycan Primer Grey for checking of errors and smoothen out everything by wet sanding and by filling the gaps using Tamiya Quick Type Putty or Melted Pla-plate and as you can see in the picture, I have already sculpt the buster and that will be my last work for this Minion.


and lastly, Making the eyes to look mad by adding epoxy on it. :)


Here are the other HD photos, Enjoy!