Sunday, July 31, 2011

WIP: 1/100 NG [BANDAI] Cherudim Gundam 3

WIP: 1/100 NG [BANDAI] Cherudim Gundam
Here are the pictures, last Wednesday and Thursday


Just ignore the head T_T i'm going to change it.


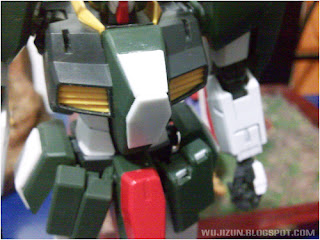
Here's the problem...but we can fix that later.


Go to the sunlight and check the excess then mark it up with your pencil.

Then slice the excess part and sand it all away to make it smooth.

And we got this!

Lots of seamlines needs to fix up

and i made the puttying last saturday to hide the seamlines between those pla-plates.


I just sand it with 600 GRIT and a FINE GRIT Sandpaper after the curing.


Then yesterday, i started to cut the parts of the shield by using .5mm pla-plate and a reference picture of it.


If you're tired to measure the size again and again, you can just cement it over the pla-plate and remove the excess. 


And sand each side of it.

Made of 3 of .5mm pla-plate to make it thicker.

And here's the shield line art from Wiki, and a flat image of the shield from zerogunz wip section.
I resize the flat image of it in Ms Word then print it out and put it over the pla-plate with masking tape and start slicing each part!

The last weapon for the appearance is this shampoo! why? you can use their cups instead of buying a clear pla-plate.


See you on my next WIP. Thanks for reading.

Thursday, July 28, 2011

Featured WIPs in GMAC! 1

Some Stunning WIPS in GMAC
I decided to featured some of our GMAC bros wip here to let the readers inspire and start scratch building.
Click on their pictures to view their albums.

Tuesday, July 26, 2011

WIP: 1/100 NG [BANDAI] Cherudim Gundam 2

WIP: 1/100 NG [BANDAI] Cherudim Gundam
So, here's what i have this rainy afternoon :D

I started to finish the front part of the chest


Here's the result. Next is to remove the excess.


 Remove the excess by sanding it to a 400 Grit sandpaper or 300 so you can quickly remove it. Follow one direction only to avoid damage on the edges.


Here's the result for Sanding it.
 

I also started to make the upper part of it and plan the placement and size of the part.
Others might do puttying first before applying the pla-plate but i don't want to make it dirty since i have no idea on using pioneer epoxy putty clay. 

Here's the part of what i've done.


I Just put it under the chest, so i can easily check if it is exactly fit the edges.


Thanks for reading again! Next is the lower part of it before the torso.

Sunday, July 24, 2011

WIP: 1/100 NG [BANDAI] Cherudim Gundam 1

WIP: 1/100 NG [BANDAI] Cherudim Gundam
I bought this cheap kit from a GMAC Bro, Me and Billy Potz decided to make a FACE-OFF Match between him and I using 1/100 NG Cherudim Gundam. This time i'm going to do some Major modding to this kit to make it look like the seven guns (SAGA) from V series of Gundam 00.


Sanding all the parts using 400 Grit Sandpaper and 3m Sponge Sanding paper FINE to remove the factory defects, nubs and for the paint to stick.


Washing it to remove the dust.

Next, is making it dry.


I also add 2 layers of .5 tamiya Pla-plate to both side skirts.


I also start trimming the front skirt... its a little bit dirty so i need to clean it up soon.
Too bad when i'm trimming, my finger accidentally catch by my new knife. O_O 
I will move on the Knee Armor while waiting for my finger to cure :D

I made 8 same patterns for the knee armor.

And here's the result so far:

Here's the knee armor:


Added another layer of .5mm pla-plate for the design.


 After sanding the knee armors, i decided to start the chest part


Stay Tuned! Thanks for reading!